4 Simple Ways to Make Yarn PomPoms
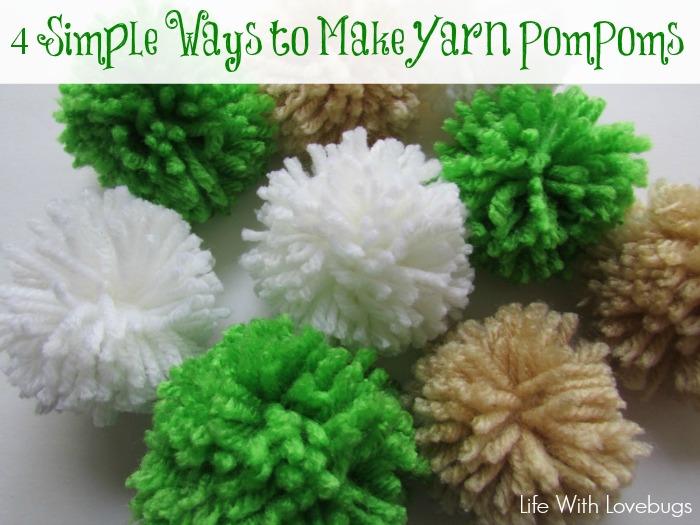
Did you ever make yarn pompoms as a kids? Or maybe you had a Grandma who added them to knitted hats and blankets? The first time I ever made yarn pompoms was just last year. Yep, one short year ago. I honestly had no idea how to make them and I know that I am not alone! Did you know that there are several ways to make pompoms? And that there are even tools that you can buy to make them? Well, today I am going to share a few of the ways that I have learned to make yarn pompoms over this past year.
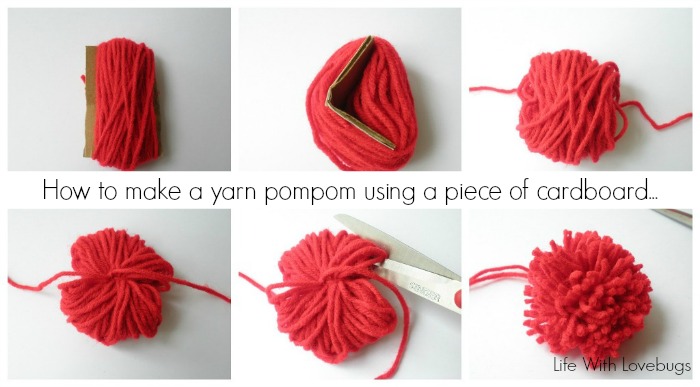
- For this method, you first cut a piece of cardboard to your desired length. The longer your cardboard, the larger your pompom.
- Start wrapping your yarn around the cardboard length wise, if you are making several for a project be sure to keep count of how many times you wrap the yarn around so that you can do the same for each. Once you’re done, bend the cardboard slightly in the middle so that you can slide off your yarn.
- Then tie a piece of yard around the middle of your bundle tightly and knot it a few times.
- Cut each side of yarn loops in half, then trim the pompom so that the pieces are all the same size.
This method is easy, inexpensive and can easily be adjusted to make different size pompoms.
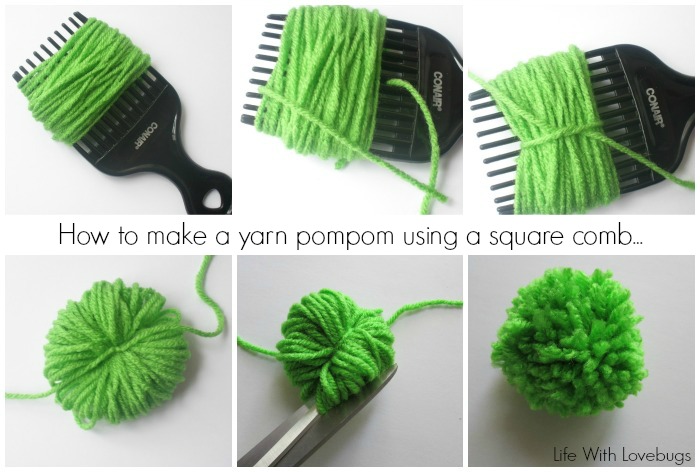
- This method requires that you purchase a square comb, as pictured above. Start wrapping your yarn around the comb, if you are making several for a project be sure to keep count of how many times you wrap the yarn around so that you can do the same for each.
- Once you’re done, slide a piece of yarn in between the middle of the comb and tie into a knot.
- Slide off your yarn bundle, then cut each side of yarn loops in half, then trim the pompom so that the pieces are all the same size.
The only drawback with this method is that you are limited to one size of pompom.
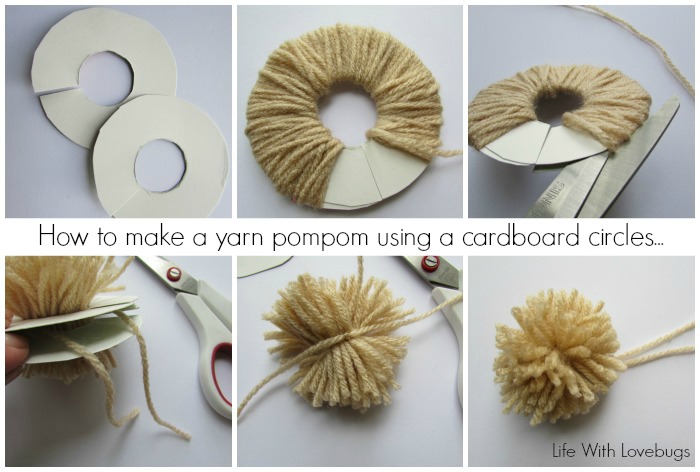
- For this method, you first cut a two circles out of cardboard then cut a smaller circle in the middle. The wider your circle, the larger your pompom.
- Start wrapping your yarn around the cardboard circle starting at one end until you’ve reached the other end.
- Once you’re done, slide your scissors between the two pieces of cardboard and cut all the way around.
- Tie a piece of yarn around the middle of your bundle tightly and knot it a few times, then trim the pompom so that the pieces are all the same size.
This method is easy, inexpensive and can easily be adjusted to make different size pompoms.
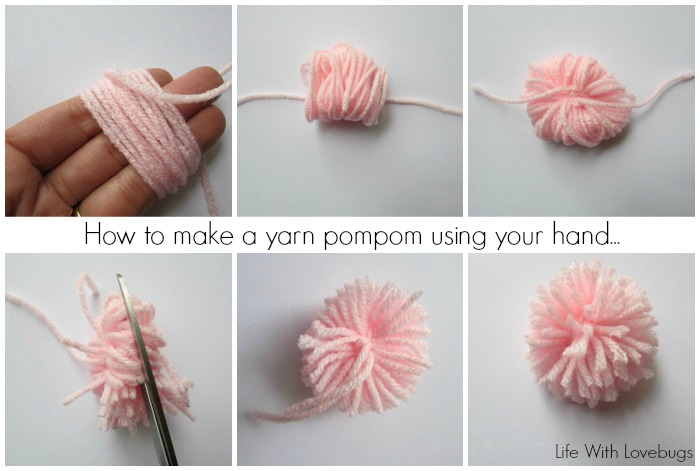
- This method is of course the most cost efficient since you don’t need anything but yourself! Start by loosely wrapping the yarn around your fingers. The more you wrap, the tighter it gets so be sure to start loose. If you are making several for a project be sure to keep count of how many times you wrap the yarn around so that you can do the same for each.
- Once you’re done, slide the yarn bundle off your hand and tie a piece of yard around the middle of your bundle tightly and knot it a few times.
- Cut each side of yarn loops in half, then trim the pompom so that the pieces are all the same size.
This method is easy and inexpensive, but you would be limited to the sizes that you could make.
Now you have 4 different ways to make yarn pompoms! I’ll be sharing a few tutorials this month on how I use yarn pompoms in decorations around my house, so stay tuned!


