Stained Glass Tissue Paper Art for Kids
I’ve been trying to keep my daughter busy with crafts, activities and outdoor play until her summer camp starts. Today’s art project was one that I had been looking forward to for a while. I’ve seen stained glass art projects before that used colored cellophane, but I really didn’t want to have to buy several rolls of different colors for this one project. I wanted to use materials that I already had on hand, so I went with colored tissue paper and clear Contact Paper.
Materials:
- 2 pieces of paper or card stock
- Scissors and/or Exacto knife
- Colored tissue paper
- Clear Contact Paper
Directions:
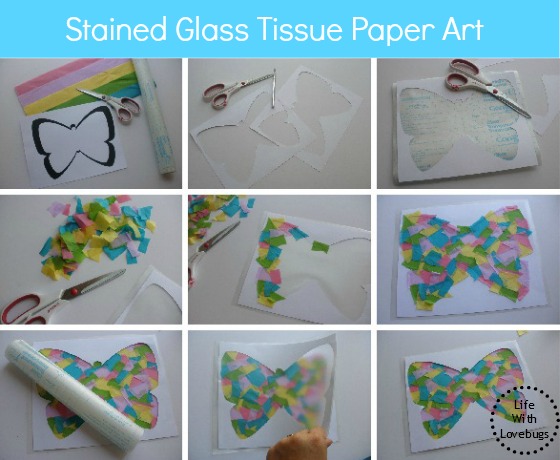
- Print out a design onto one piece of your paper or card stock. Place the two pieces together and cut out the design on both pieces of paper using scissors or an Exacto knife.
- Cut two pieces of Contact Paper to fit your cutout and apply one piece to one cutout. Set aside the other piece of Contact Paper and cutout.
- Cut your colored tissue paper into little pieces, then start to apply them to the sticky side of the Contact Paper until completely covered.
- Apply the piece of Contact Paper that you set aside to the other cutout and starting at one side, slowly place over your tissue paper design. Trim the edges leaving about 1/4″ border around the edge to prevent peeling.
- Hang on a glass door or window.
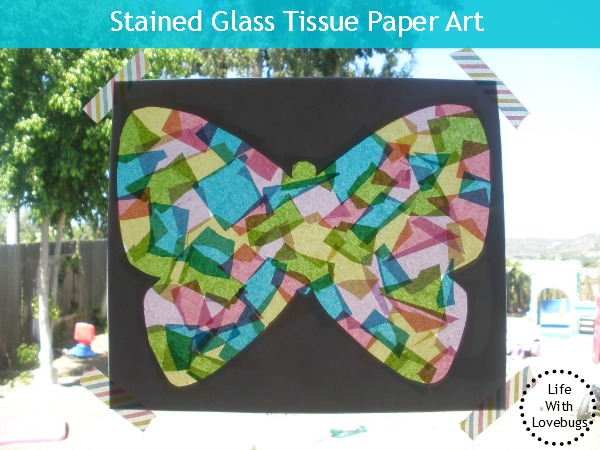
We used washi tape to hang our butterfly on our glass door so that we could easily move it if we have to. It also does not leave any residue, which means less cleanup for me!

